Over recent years, facebook has changed their API framework a
lot limiting what you can do with it, especially when it comes to
interacting with other facebook user that has not given your app
any permissions. Facebook event creation, which I am going to cover
in this tutorial is one of the last API methods which, by creating
an event and inviting other users to it, allows you to communicate
with other facebook users by sending them an invite. You are not
able to post to user wall (without him giving your app permission
first) or send direct facebook messages anymore.I
In this tutorial, firstly we'll set up communication framework,
create invite model and controller and finally add some form in
which user can specify event details.
This is part 5 of Facebook API integration in ASP.NET series. In
order to complete this tutorial, you need to have facebook login
button integrated in your app. Please check out Part 1 -
Integrating Facebook Login button in ASP.NET MVC 4
application for insturctions on how to do so and
working solution that you need for this tutorial.
If you've completed part 4 - Posting to
facebook user's wall in ASP.NET MVC 4, you've got
communication structure already in place, click here to skip down to event model part.
Communication infrastructure
Facebook API is no different than any other API service I've
come accros so far. For this tutorial, I don't want to use any 3rd
party communication plugins for 3 simple reasons:
- It won't save us a lot of time
- We'll have full control over the code
- You'll be able to apply this knowledge and reuse my code for
pretty much any other API integration
Let's start from creating MethodResult class. This will be our
standard method return object that we'll use troughout this
project. Right click on Models folder and select Add -> New Item
-> Class. Name it MethodResult.cs. Paste in
following code:
namespace FacebookLoginButton.Models
{
    public class MethodResult
    {
        public string errorMessage;
        public ReturnCode returnCode;

        public enum ReturnCode
        {
            Unknown = 0,
            Success = 1,
            Failure
        }
    }
}
We also need some helper methods in our project. Add new
Helper.cs file in the root of our app.
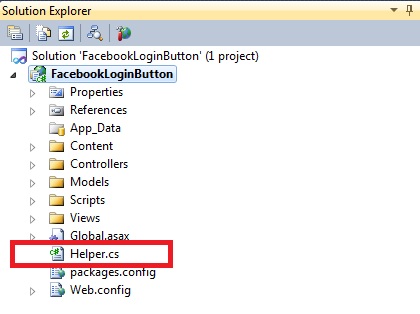
and paste in following code:
using System;
using System.Collections.Generic;
using System.IO;
using System.Net;
using System.Text;
using FacebookLoginButton.Models;

namespace FacebookLoginButton
{
    public class Helper
    {
        public static MethodResult SubmitPost(string url, string postValues, out string response)
        {
            MethodResult result = new MethodResult();
            response = string.Empty;

            try
            {
                ASCIIEncoding encoding = new ASCIIEncoding();
                byte[] data = encoding.GetBytes(postValues);

                HttpWebRequest webRequest = (HttpWebRequest)WebRequest.Create(url);
                webRequest.Method = "POST";
                webRequest.ContentType = "application/x-www-form-urlencoded";
                webRequest.Timeout = System.Threading.Timeout.Infinite;

                webRequest.ContentLength = data.Length;

                Stream requestStream = webRequest.GetRequestStream();
                requestStream.Write(data, 0, data.Length);
                requestStream.Close();
                requestStream.Flush();

                WebResponse webResponse = webRequest.GetResponse();
                StreamReader reader = new StreamReader(webResponse.GetResponseStream());

                var dataReceived = reader.ReadToEnd();

                webResponse.Close();
                reader.Close();
                webRequest.Abort();

                result.returnCode = MethodResult.ReturnCode.Success;
                response = dataReceived;
            }

            catch (Exception ex)
            {
                result.returnCode = MethodResult.ReturnCode.Failure;
                result.errorMessage = ex.Message;
            }

            return result;
        }


        public static string BuildPostString(Dictionary<string, string> postValues)
        {
            StringBuilder sb = new StringBuilder();

            foreach (KeyValuePair<string, string> value in postValues)
            {
                if (sb.Length > 0) sb.Append("&");

                sb.Append(string.Format("{0}={1}", value.Key, value.Value));
            }

            return sb.ToString();
        }
    }
}
Helper.cs contains 2 handy methods. SubmitPost makes a post
request to given address and BuildPostString builds correct url
including all get parameters that we want to pass.
Event model
In order to create an event model, right click on Models folder
and select Add -> New Item -> Class and name it
FacebookEventModel.cs. Make sure its got all
properties and attributes as follows:
using System;
using System.ComponentModel.DataAnnotations;

namespace FacebookLoginButton.Models
{
    public class FacebookEventModel
    {
        [Required]
        [Display(Name = "Event Name")]
        public string name { get; set; }

        [Required]
        [Display(Name = "Start Time", Description = "yyyy-MM-dd HH:mm")]
        public DateTime start_time { get; set; }

        [Required]
        [Display(Name = "Location")]
        public string location { get; set; }

        [Required]
        [Display(Name = "Privacy Type")]
        public string privacy_type { get; set; }
    }
}
Rebuild your solution!
This time, we added some atributes above model properties to add
some validation and make the form look prettier.
Event controller
Now, as we've got our model created, we can add event controller
that will hadle facebook communication and process our request.
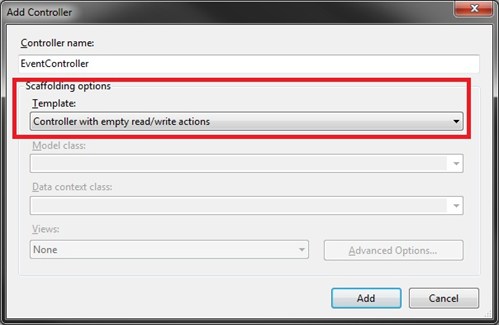
Right click on Controllers folder and select Add -> Controller.
Call it EventController and make sure its got empty read/wrtite
actions selected in Scaffolding options -> Template dropdown as
shown below:
VisualStudio will prepopulate our controller with several
methods. The only 2 we need are public ActionResult Index() and
public ActionResult Create(FormCollection collection). Remove all
methods except these 2.
Event form
View() in Index() method should be highlighted in red indicating
that there is no view file (.cshtml) associated with this method.
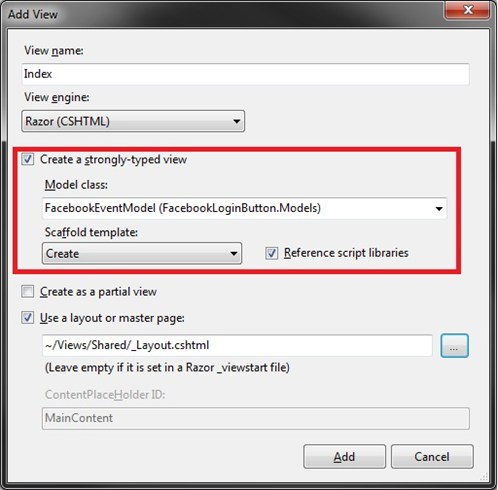
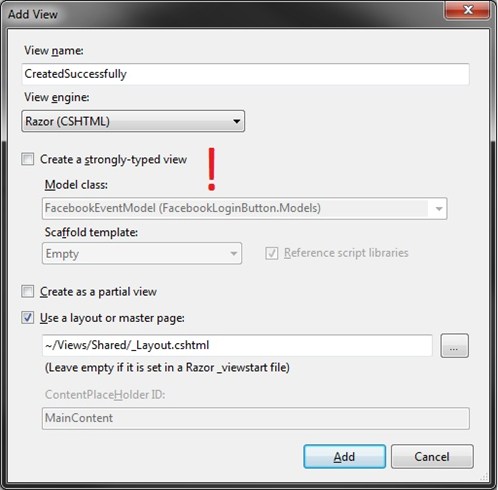
Right click on View() and select add view. Now, be carefull, since
we're passing an object to it, it needs to be a strongly-typed
view. This will make all object properties accessible via @Model
variable. Also, we want Visual Studio to generate create form for
us, so make sure we've got Create selected in Scaffold template
dropdown. Before clicking OK, make sure all properties in the
window are set as on following screen:
You'll find html for the form in Views -> Event ->
Index.cshtml file. The form is pretty much ok as generated by
Visual Studio. The only thing you need to change is BeginForm()
declaration to following:
Html.BeginForm("Create", "Event")
Also, I'd recommend to do is to change privacy_type to a
dropdown with OPEN, CLOSED or SECRET event properties. It'd make
more sense from UI point of view.
Now, let's come back to our controller and add some logic to
process our request.
Before we do any more coding, we need to install
Newtonsoft.Json.dll that will helps us with Json string -> C#
object conversion. Below, in article attachments section, there is
Newtonsoft.dll download available. Unzip it and
drop folder content into /bin folder inside your
app. Once you've done that, in Visual Studio, right click
References folder, and add reference to
Newtonsoft.dll file that you've just dropped into /bin. If
you've completed any other of my facebook tutorials (except part 1
- login button), this dlls should already be found in /bin
directory.
In EventController.cs file, replace public ActionResult
Create(FormCollection collection) method with following
code:
[HttpPost]
        public ActionResult Create(FacebookEventModel eventModel)
        {
            try
            {
                var postValues = new Dictionary<string, string>();

                // list of available parameters available @ http://developers.facebook.com/docs/reference/api/event/
                postValues.Add("access_token", Session["accessToken"].ToString());
                postValues.Add("name", eventModel.name);
                postValues.Add("start_time", eventModel.start_time.ToString("yyyy-MM-dd HH:mm"));
                postValues.Add("location", eventModel.location);
                postValues.Add("privacy_type", eventModel.privacy_type);

                string facebookEventId = string.Empty;
                string response;
                MethodResult header = Helper.SubmitPost(string.Format("https://graph.facebook.com/{0}/events", Session["uid"].ToString()),
                                                            Helper.BuildPostString(postValues),
                                                            out response);

                if (header.returnCode == MethodResult.ReturnCode.Success)
                {
                    var deserialised =
                        Newtonsoft.Json.JsonConvert.DeserializeObject<Dictionary<string, string>>(response);
                    facebookEventId = deserialised["id"];

                    return RedirectToAction("CreatedSuccessfully");
                }

            }
            catch
            {

            }

            return RedirectToAction("EventCreationError");
        }
We also need to add 2 missing actions that we redirect to in the
code above. Add following code below Create() method:
public ActionResult CreatedSuccessfully()
        {
            return View();
        }


        public ActionResult EventCreationError()
        {
            return View();
        }
Make sure EventController has got all methods and properties as
on this screen:
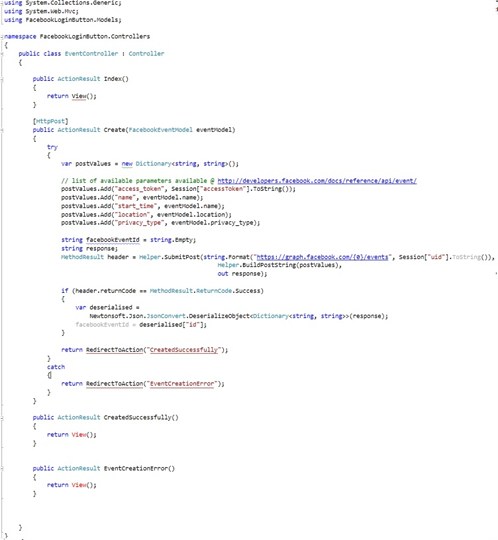
Note that, we are not using facebookEventId variable at all. I
added it in case you want to return and present it to user.
Last thing we need to do is to create success and error view.
Right click on return View(); statement and add .cshtml views for
success/failed attempt notification pages.
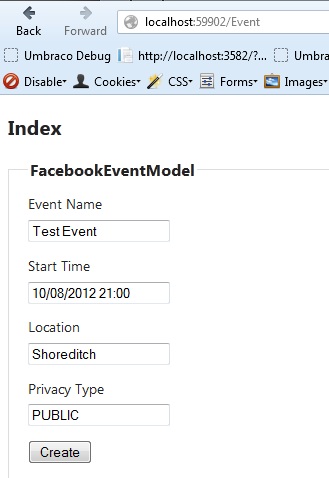
Now, rebuild your solution, make sure you dont have any errors
on build, press F5 (unless you have it configured as a host), login
to facebook using facebook button and go to /Event
url. If you've done everything right, you should see following
screen:
Btw. You may also consider extending session timeout to keep
facebook access token in the memory for a little bit longer. Also,
it'd be worth to add try/catch login to UserDetails() method in
case accessToken variable in nor present in Session object.
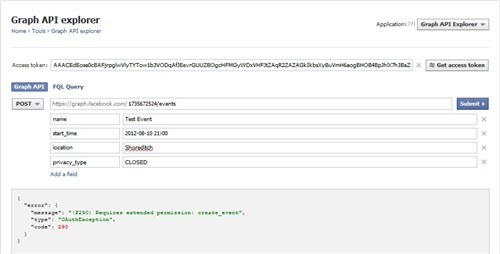
Graph API explorer
If you're experiencing any diffulties trying to get this or any
other API method to work, facebook has got online testing tool
available at: http://developers.facebook.com/tools/explorer/.
To test any available API method, enter or request an access token,
enter the url you're sending your request to, change request method
to GET or POST and add all parameters as required.
Feel free to check out my other facebook tutorials!
Tagged: .NET 4
ASP.NET MVC
C#
Facebook Graph Api
JSON
MVC 4